Hey there, if you’re reading this, you just dropped a pretty big chunk of coin on a gantry machining center—congrats, that’s a game-changer for your shop, right? But before you get to running parts that’d make your old mill cry, there’s one step that’s make-or-break: installing it. I’m Jake, been selling these things for 7 years now, and I’ve seen install go right (way more often) and go wrong (once, we had one that took 3 extra days ’cause the slab wasn’t level—ouch). This post isn’t gonna be some fancy, AI-generated list of steps with zero real-world context. I’m gonna walk you through exactly what we walk our clients through every time, no fluff, so you don’t waste time (or money) down the line. Gantry Machining Center
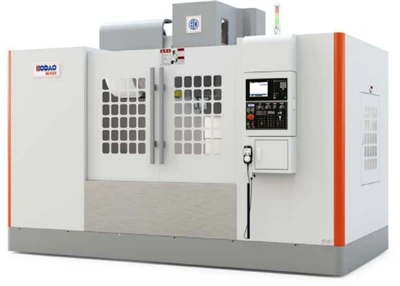
First off, let’s get one thing straight: this isn’t a plug-and-play microwave. A gantry machining center is a 10,000-pound (or more) beast that needs a solid home, the right tools, and a crew that knows what they’re doing. I don’t care if you’ve installed 10 Bridgeports—this is a different animal. Let’s break it down step by step, the way we do it for our clients.
Step 1: Prep The Site Before The Delivery Trucker Even Shows Up
This is the most important step, and 90% of the headaches I see happen here. You can’t have the delivery truck pull up to a muddy lot and expect this $500k machine to go in smoothly. What do you need? Let’s start with the floor. Your gantry needs a reinforced concrete slab—no carpet, no loose tile. How thick? At least 12 inches for smaller models (under 30,000 lbs) and 18 inches if you’ve got a big boy (40k+ lbs). And it can’t just be thick—it has to be flat. We use a 10-foot straightedge and feeler gauges to check: max gap should be 0.005 inches. If it’s off by more than that, you’re gonna fight axis alignment forever, or even warp the machine frame. Ask me how I know—last year a client skipped the concrete prep, and 6 months in the spindle started vibrating so bad it was ruining their parts.
Next, power. You can’t plug this into a regular 240V outlet. Our machines need a dedicated 480V 3-phase circuit, with a separate ground—no sharing with your forklift or air compressor. We tell clients to hire a licensed electrician to run the line before delivery, not after. I’ve had more than one electrician say “3-phase’s easy, I’ll handle it” and then mess up the wiring so bad the machine’s control panel wouldn’t turn on. Save yourself the call to our techs—pay the extra for a pro.
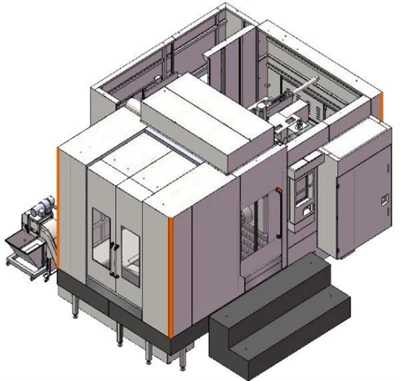
Also, clearance. You need at least 3 feet around all sides for the crew to work, plus 8 feet above the gantry bridge when it’s in the up position. And don’t forget the door—your delivery truck’s gonna need 12 feet of width to back up, and the machine itself might be 10 feet wide when it’s crated. Measure twice, or the driver’s gonna have to offload in the parking lot, which means extra labor for you.
Step 2: Offloading The Machine—Don’t Let The Trucker Wing It
Delivery companies usually offer offloading, but here’s the thing: they’re not gantry machining center experts. They move skids and heavy equipment, but they don’t know the fine print of lifting a machine that’s balanced just right. When the truck shows up, be there with your foreman, and tell them exactly where they need to put the skid the machine’s sitting on. We use heavy-duty cranes (not forklifts, unless the machine’s tiny) with spreader bars to lift the crate—never hook it to just one side, that’ll bend the frame.
Once it’s on the floor, you have to uncrated it carefully. We mark all the bolts and brackets with paint before shipping, so you don’t mix up parts. And keep the manual handy—we label every loose part with a number that matches the manual’s exploded view, so you don’t lose a bracket that’s only $20 but will hold up the install for a day.
Step 3: Leveling The Machine—This Is Non-Negotiable
Okay, time for the part that makes or breaks everything. You can’t just set the machine on the floor and call it level. Gantry machines have four main leveling feet (some bigger ones have more), and you have to adjust them with a hydraulic jack and a precision level (we use a digital level that reads to 0.001 inches, not a bubble level from the hardware store).
Here’s my trick: start with the X-axis (the long, horizontal rail) and level that first. Then the Y-axis (the gantry that moves along the X) and the Z-axis (the spindle that goes up and down). Do it slow—spin each leveling foot a quarter turn, wait 5 minutes, then check again. The machine’s frame will settle, so you can’t rush this. If it’s off by even 0.010 inches, you’ll get sloppy cuts, and your spindle wear will go through the roof. I’ve seen a client skip this and have to replace the spindle after 3 months—cost him $15k. Worth taking 2 hours to level right? Yeah, I think so.
Step 4: Electrical & Air Hookup—Don’t Guess On This
Remember that dedicated 480V 3-phase line you had run? Now it’s time to connect it to the machine’s control panel. First, turn off the main breaker—always. No exceptions. Then follow the wiring diagram we send with every machine—don’t try to “make it work” by twisting wires. Our techs test every wire before shipping, so if it doesn’t line up, you messed up.
Then the air supply. Most gantry machining centers need 80-100 PSI of compressed air, with a dryer—moisture in the air will mess up the spindle and the linear guides. We tell clients to install a filter-regulator-lubricator unit right at the machine’s air inlet, not 20 feet away, because moisture can collect in the line.
Once you hook everything up, do a power test. Turn on the breaker, then the control panel, and check that all the lights come on. Then run the machine’s self-diagnostic test—every one of our models has this, it checks the axes, the spindle, and the coolant system. If it throws an error, don’t panic—just call our tech line, we’ll walk you through it, but don’t start messing with wiring until you know what you’re doing.
Step 5: Alignment & Calibration—This Is Where The Precision Comes In
You leveled it, now you have to align the axes. This isn’t just “make ’em move straight.” We use a laser alignment tool to check the X and Y axes—they have to be parallel within 0.002 inches over 10 feet. The gantry has to square up with the X rail too, same tolerance.
Then calibration. You’ll need a test part—usually a simple square block of aluminum—and run a contouring cycle. Check the cuts with a coordinate measuring machine (CMM) or even a good quality digital caliper. If the square’s sides are off by more than 0.005 inches, you need to tweak the alignment some more. This step takes time, but it’s how you get parts that are within tolerance—no more reworks because the machine was off.
Step 6: Break-In & Training—Don’t Skip This, Trust Me
Once the machine’s aligned and calibrated, you can’t just run it at full speed for 8 hours the next day. You have to break it in. Run it at 50% speed for the first 2 hours, then 75% for the next 2, then full speed for 1 hour. This lets the linear guides and bearings seat properly, so you don’t get premature wear.
And training—this is the part most clients overlook. We offer on-site training for our machines, because a machine is only as good as the person running it. Teach your operator how to change tools, adjust the offset, and spot small problems before they become big ones. Last year a client didn’t train their new operator, and they crashed a ½ inch end mill into the gantry—cost $8k in repairs. Training pays for itself.
Now, a few pro tips from someone who’s done this a hundred times. First, have a spare set of leveling feet on hand. If you’re working on an older shop floor, they might wear out after a few years, and you don’t wanna have to wait for parts when you’re in the middle of a big job. Second, keep a log of every install step—when you leveled it, when you calibrated it, when you changed the air filter. That log will save you time when you’re troubleshooting issues down the line. Third, don’t ignore small errors. If the machine is vibrating a little, or a cut is off, don’t wait to fix it—call us right away. We’ll help you figure it out, and it’s way cheaper than letting it get worse.
Look, installing a gantry machining center isn’t rocket science, but it’s not a Saturday project either. If you take your time, prep the site, do the leveling right, and get your team trained, you’ll have a machine that runs for 20+ years and pays for itself in no time. If you’re in the market for one, or need help with an install, reach out—our team’s got the experience to make it go smooth.
Now, before you go, remember: every machine we sell comes with a 1-year support plan, and our techs are on call 24/7 for installation questions. Don’t take shortcuts here—your parts and your bottom line depend on it.
Vertical Machining Center References:
- Haas Automation, Inc. "Gantry Machining Center Installation Guidelines"
- DMG MORI. "Precision Alignment for Large Machine Tools"
- National Center for Manufacturing Sciences. "Industrial Machine Setup Best Practices"
Taizhou Qiyang Trading Co., Ltd.
As one of the most professional gantry machining center manufacturers and suppliers in China, we’re featured by quality products and good price. Please rest assured to buy bulk gantry machining center for sale here and get quotation from our factory. Customized orders are welcome.
Address: Zhenhai Village, Binhai Town, Wenling City, Taizhou City, Zhejiang Province
E-mail: qycncmachine@outlook.com
WebSite: https://www.qycncmachine.com/
